How to Turn a Floor Plan into 3D
Prepare a clean 2D plan, choose the right visual assumptions, generate a 3D preview, and review the result without confusing it with construction data.
 Make Floor Plan Team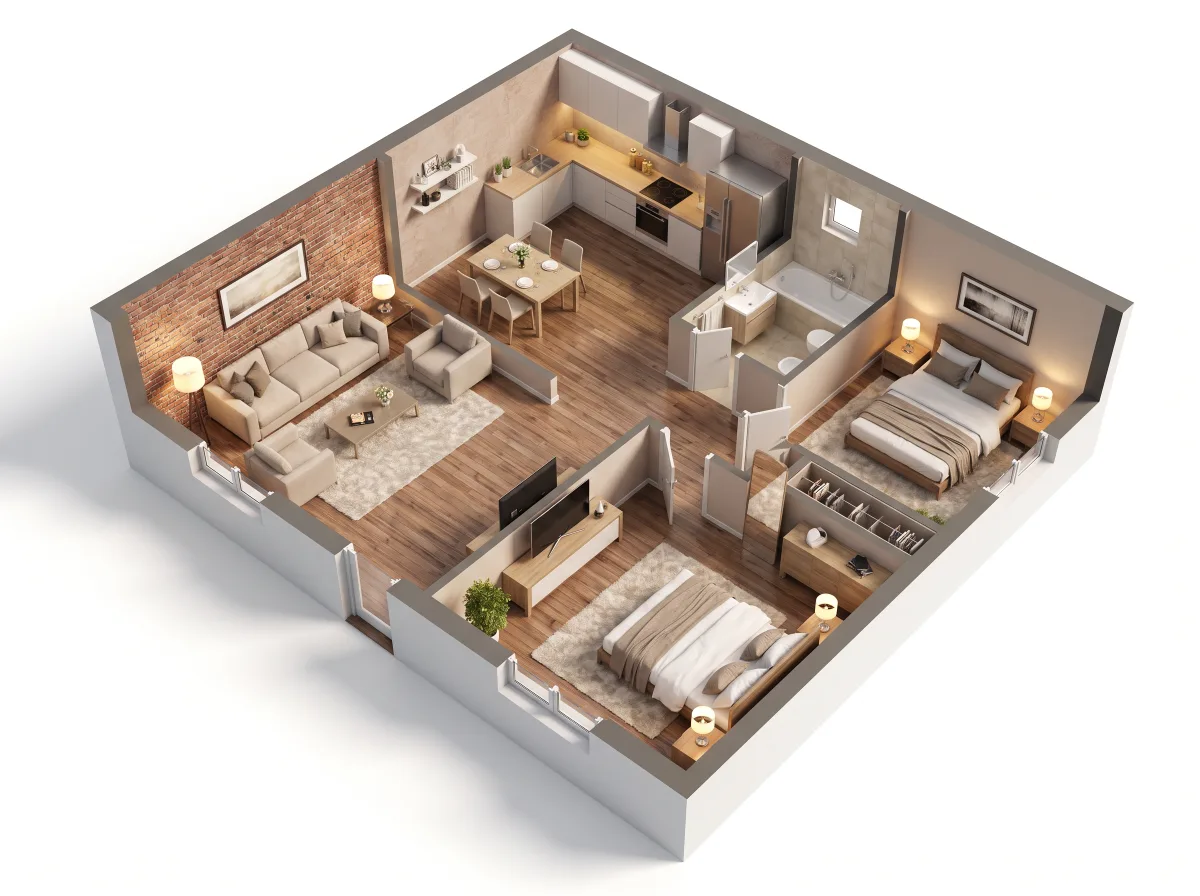
A 3D floor plan can make a layout easier to understand, but it cannot repair missing information in the 2D source. The best results come from a simple sequence: clean the plan, confirm the layout, state the visual assumptions, generate the 3D view, and compare it with the original.
Use this workflow when you need a presentation image for a listing, renovation discussion, client review, or early interior concept.
Already have a readable 2D plan?
Upload the complete floor, choose a 3D style, and keep the source beside the result for review.
Upload a floor plan for a 3D previewChoose a complete 2D source
Start with one image that shows the entire level. It should have a clear boundary, visible interior walls, readable openings, and room labels that do not overlap the geometry.
The source can be:
- A digital 2D floor plan
- A clean scan or PDF export
- A photographed hand sketch
- A simplified listing plan
- An AI-generated concept plan
Avoid combining several partial screenshots. They may use different scales or orientations, and the missing connections will have to be guessed.
If your source is a rough drawing, prepare it with the sketch conversion checklist before creating the 3D version.
Confirm the layout before adding visual detail
Review the plan in 2D first. Check the exterior shape, room order, openings, circulation, and approximate proportions.
Ask:
- Is every enclosed space understandable?
- Are doors and windows distinguishable?
- Do the room labels match the boundaries?
- Is the entrance easy to identify?
- Are stairs, balconies, and large openings shown?
If the 2D layout is wrong, the 3D view will make the same problem more attractive, not more accurate. Use the online floor plan editor to create a clean review version before conversion.
Decide which assumptions are acceptable
A flat plan often does not contain wall height, ceiling height, window sill height, materials, lighting, or furniture style. A 3D preview must make visual assumptions about those missing details.
Write down what is known and what is being interpreted. For example:
- Wall height is illustrative.
- Furniture shows scale, not a final specification.
- Window style is approximate.
- Materials are for presentation only.
- The drawing has not been measured on site.
This distinction is essential when the image will be shown to a buyer, client, contractor, or planning team.
Pick a view for the question you need to answer
An isometric or dollhouse view is usually the best first output because it shows the whole layout and the relationship between rooms. A lower interior camera is better for atmosphere, but it hides more of the plan.
Use an isometric view to discuss:
- Room adjacency
- Furniture zones
- Circulation
- Open-plan relationships
- The overall property layout
Use an interior perspective to discuss:
- Sightlines
- Perceived openness
- Furniture height and visual balance
- Materials and mood
The article 2D vs 3D floor plans explains why both views should remain available during review.
Run a 60-second source check before uploading
Use this quick gate before spending time on a 3D render:
| Check | Ready to upload | Fix first |
|---|---|---|
| Full floor | One complete level is visible | Several cropped screenshots |
| Geometry | Exterior and interior walls are continuous | Gaps, heavy shadows, or overlapping marks |
| Openings | Doors and windows are distinguishable | Openings cannot be separated from wall lines |
| Labels | Labels sit inside the correct rooms | Text covers walls or belongs to an unclear space |
| Orientation | The image is upright and easy to read | Rotated, skewed, or photographed at an angle |
If one of the geometry checks fails, clean the source in the floor plan editor or follow the sketch conversion checklist before generating the 3D preview.
Keep the first 3D version visually simple
Begin with neutral materials and a small amount of furniture. The first version should explain the layout, not compete for attention.
Add only enough furniture to test:
- Whether a bed fits with usable access
- Whether dining chairs have space to move
- Whether a sofa blocks a doorway or route
- Whether a narrow room still works
- Whether circulation remains visible
Highly decorative furniture, strong textures, and dramatic lighting can wait until the underlying layout is accepted.
Compare the 3D result with the 2D plan
Place the images side by side and review them in the same order:
- Exterior footprint
- Number and position of rooms
- Interior wall connections
- Door and window openings
- Stairs and outdoor connections
- Relative room proportions
- Furniture clearance
Do not approve a 3D result only because it looks plausible. Small geometry changes can be hard to notice once the image includes furniture and materials.
Export and label the result honestly
For a listing or presentation, export a large image with readable room relationships and enough margin around the plan. If the source is conceptual or approximate, include a short note such as “3D concept preview — verify dimensions and construction conditions separately.”
A 3D floor plan is a communication image. It is not proof of ceiling height, structural feasibility, code compliance, material availability, or measured dimensions.
Turn the approved 2D direction into a review image
Upload one complete plan for a 3D preview, or clean unclear walls and labels before conversion. Keep measured drawings as the source of truth.